
One of the main adjustments involved in switching to a vegan diet is replacing dairy with plant-based alternatives. Almond milk was an early favorite of mine. It has a neutral taste, goes well with cereal, and makes a great hot chocolate.
However nothing compares to the creamy deliciousness of homemade almond milk. Whereas store-bought almond milk can be a bit watery and thin, homemade almond milk is thick and creamy. Homemade almond milk is one of the great discoveries I’ve made since adopting a vegan diet.
Even if you have never enjoyed almond milk, I’d encourage you to give homemade almond milk a try.
Background
Making almond milk is fairly simple. You soak almonds, blend them with water, and strain them through a nut milk bag, a fine nylon mesh bag made for this purpose.
Nut milk bags are like a sturdier, finer version of cheesecloth. You should be able to find them at any health food store, although the heavy duty kind sold online are much higher quality than the ones I’ve found in stores. I’ve been using this Ellie’s Best bag recently.
Prior art
Typical almond milk recipes simply soak almonds, blend them with water, and strain. This leaves the almonds’ outer skin intact, and mixed into the almond milk, producing a grey color. The advantage of this approach is the easier process, and the skin nutrients remain in the milk.
To make whiter almond milk, recipes may suggest blanching the almonds, which means removing the outer skin. This does produce a whiter milk, but is tedious and labor-intensive.
Oral allergies
A minor complication is that almonds are a common oral allergen. Oral allergies are a type of crossover sensitivity typically caused by an allergy to a pollen that is similar to protein found in foods. If raw almonds make your mouth itch, but you are not allergic to cooked almonds, then you may have almond oral allergies. An allergist can help you make this determination.
Store-bought almond milk is pasteurized, whereas homemade almond milk made from raw almonds is not. This spells trouble for those of us with an oral allergy to raw almonds. To neutralize the oral allergens, we’ll have to heat the almonds at some point in the process.
(Just to be clear, if you have a true almond or tree nut allergy, you should not consume any almond milk, including almond milk made with this recipe. Please consult an allergist if you’re unsure.)
Invention: the boil-soak approach
Here, I present an alternate approach, that has some of the benefits of both regular and blanched almond milk, without the time-consuming blanching process.
This technique involves boiling almonds in some water for a few minutes at the beginning of the soaking process. Heating almonds to boiling temperatures denatures the allergenic proteins, making them safe for those of us with oral allergies. This is much easier than boiling the almond milk later, since almond milk has to be heated very carefully.
Then, leave the almonds soaking in the water you boiled them in for up to a day, moving them to the refrigerator after they cool.
To make white almond milk, discard the soaking water (now a dark brown color) and use new water for the almond milk. If you’d rather preserve the almond skin nutrients, feel free to use this water for the almond milk, but measure it out so you use the right amount of water.
This approach is oral-allergy friendly, lets you make white almond milk easily, and produces incredible almond milk.
Recipe
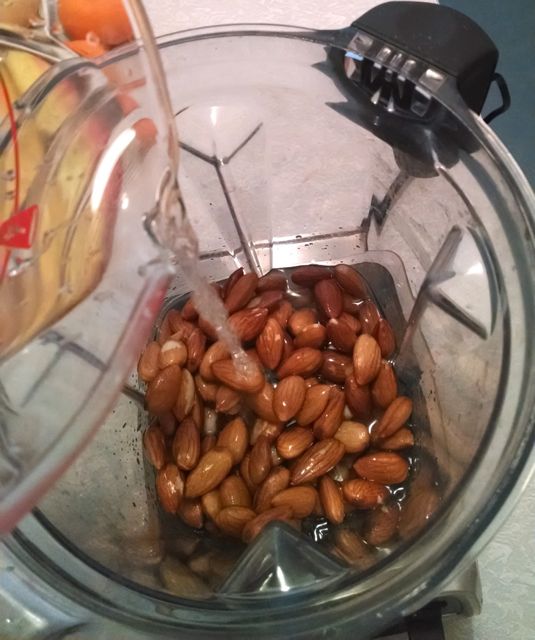
You’ll need 1 cup of raw almonds, some water, a nut milk bag, something to boil and soak almonds in (a small pot works fine) and a blender.
Ahead of time (8 to 24 hours is great, but shorter is probably fine), put the almonds in enough water to cover them by an inch or so, and boil for a few minutes. Then let them sit in that water and soak, covered. Put the pot in the fridge once it’s cool if you’re going to soak longer than 8 hours or so.
1. Blend the soaked almonds with two cups of water.

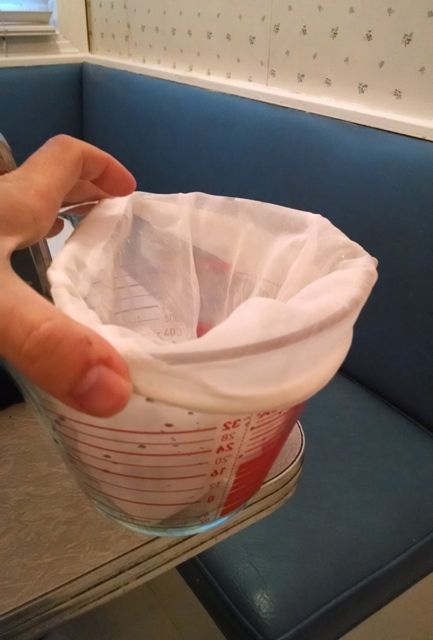
2. Pour the almond mixture into a nut milk bag in a container.
I recommend using a pourable container like a large measuring cup, since we’ll be transferring liquid between this container and the container you’ll store the milk in.


3. Squeeze!
Be gentle, especially at first, to avoid almond solids from squirting out. You can use more pressure as the contents become more solid. Don’t stress too much if some solids escape.
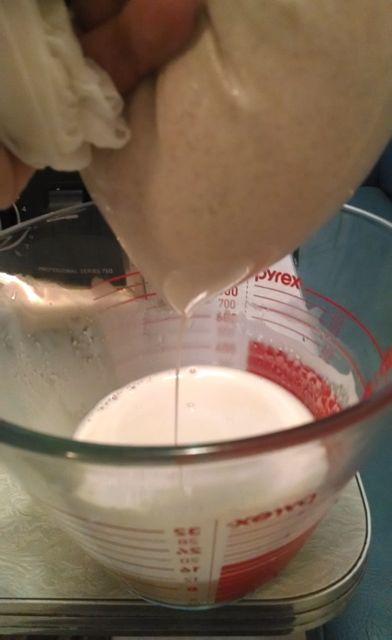

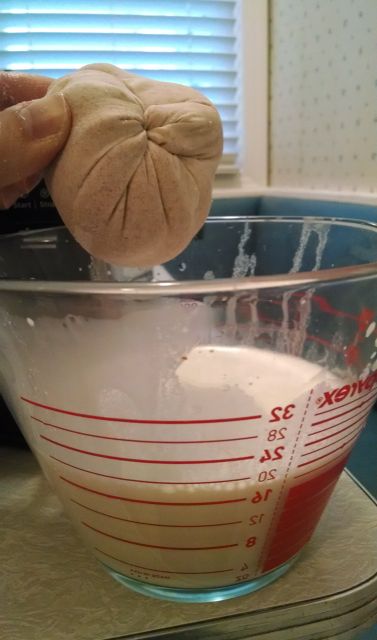

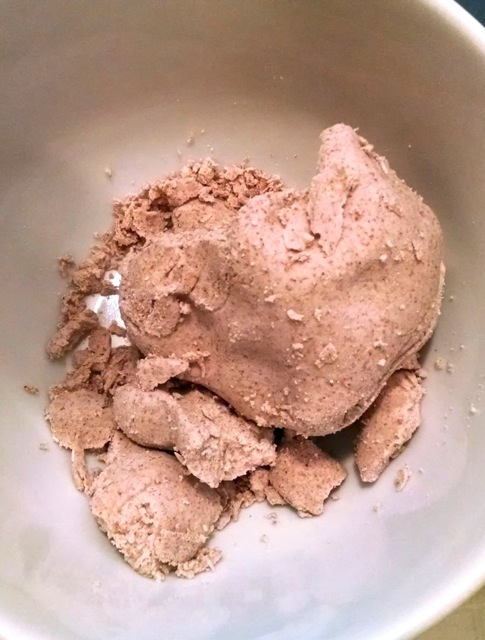
You’ll be left with the first pressing of almond milk and almond pulp.
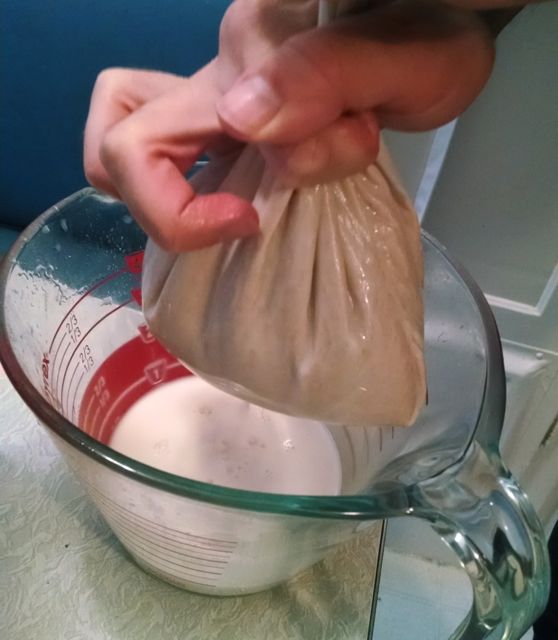
Don’t rinse the blender or wash out the nut milk bag, since we’ll be repeating this. Pour the almond milk into the container you’ll store it.
4. Again!
Return the pulp to the blender, and blend with another 2 cups of water, to get all the almond milk we can out of the pulp. Strain again, separating pulp from almond milk.
5. Final blend
Finally, set aside the pulp, and return some almond milk to the blender (which is still messy, with almond bits on the side). Using the most recently pressed 2 cups will work fine. Blend for a bit to incorporate almond bits.
This is also a good time to add any supplements you’ll be adding to the milk. (I’ll write more about fortifying plant-based milks later.)
Strain the milk one last time. This will be really easy, since the milk has very little pulp, and will mostly pour right through the bag.
6. Done!
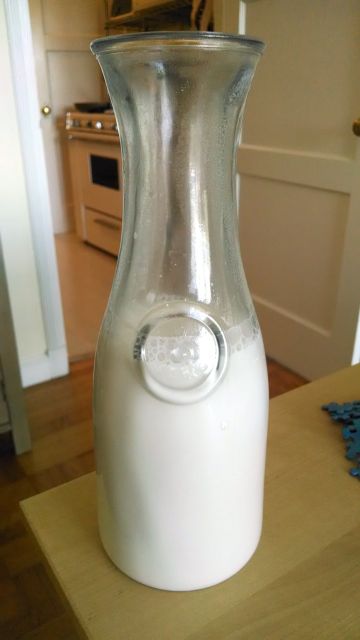
Combine the almond milk from the two phases, and refrigerate.
You should have about a liter of milk. Depending on how thoroughly you blended, the milk may be very thick, and may benefit from adding extra water. I find it’s best to thin it to taste after making it.

Serve over cereal with fruit (berries, peaches, etc.) for a delicious snack / dessert.
Variations
You can make a really delicious milk by toasting the almonds first before making almond milk. This works fine from an oral allergy perspective, and adds a unique flavor to the milk. (It’s great with cookies, for instance!) However I can’t drink very much of that milk; it’s fairly rich, and is less versatile than regular almond milk, since it has a stronger flavor.
For a while I was adding a few toasted almonds with almond milk that I otherwise prepared normally, to give it a little stronger flavor, although most of the time I don’t bother these days. Experiment and see what works for you.
References
-
LaBronx, Honey. “Episode 2 (Almond Milk).” Vegan Drag Queen Cooking Show. 28 Sep 2011. (Accessed 2 Nov 2014.)
-
Chef, Vegan Black Metal. “Episode 1: Pad Thai.” Vegan Black Metal Chef. 9 May 2011. (Accessed 2 Nov 2014.)
Not really relevant, I just think this something you should know about.
