Category Archives: Recipe

Homemade Vegan Butter: An update

Vegan Butter

I’ve posted previously about making vegan butter from Mattie’s excellent recipe at veganbaking.net. Since my previous post, I’ve made butter a few more times, and made a few small changes.

The Vegan Baking recipe

Mattie’s butter recipe at Vegan Baking is the best vegan butter recipe that I’ve come across. I love how it replicates the chemistry of dairy butter, rather than simply imitating its flavors. It uses curdled soy milk solids as a flavor base, and uses a mix of coconut oil (for solid / saturated fat) and vegetable oil as the fat.

This recipe captures the flavor and texture of butter much more realistically than any butter alternative that I’ve tried. It has a complex flavor, and could stand up to high cuisine in a way that Earth Balance could not. This recipe is still the basis for the vegan butter we’ll be making, with a few small adjustments.

Choosing Soy Milk

After making this a few times, I noticed that sometimes this would make incredible butter, whereas other times it was more pedestrian. I also noticed that sometimes the soy milk curdles in an obvious way, and other times it only curdles subtly. This led me to realize the importance of the choice of soy milk to use for making butter.

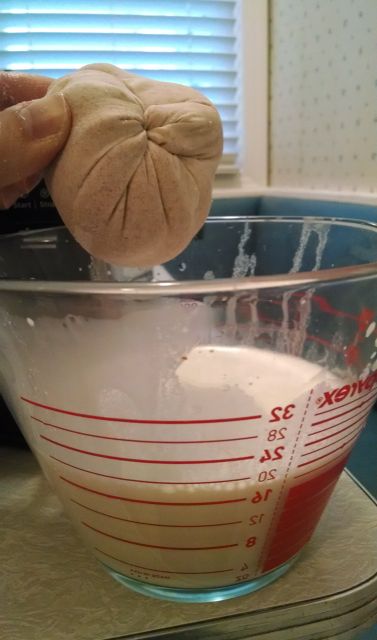
There are essentially two types of soy milk that I buy, or that I’ve seen in stores. There is general-purpose soy milk, which is usually fortified (extra calcium, vitamin B12, and usually vitamin D), and has stabilizers, such as carrageenan and xanthan gum, which keeps it from curdling in coffee, for instance. The alternative is basic soy milk, with only soybeans and water as ingredients.

In general, I think fortified / stabilized soy milk is a better choice nutritionally, since calcium, D and B12 are important in vegan diets. However for butter, as well as baked goods that require curdling soy milk, you want the basic soy beans and water style soy milk (such as this). You’ll also want the plain, unsweetened / non-vanilla kind, to avoid flavoring your butter. Since I use both types for different purposes, I usually have two types of milk at home: everyday-use fortified soy milk, and basic soy milk for making butter, yogurt, baking.

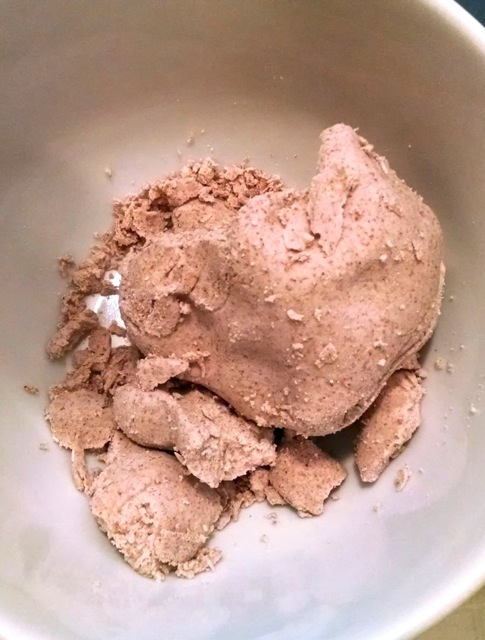
Curdling is important in giving vegan butter characteristic butter flavors, so choose a soy milk that curdles.

Vinegar

I’ve also found the choice of vinegar to be important in making vegan butter. The Vegan Baking recipe originally called for apple cider vinegar, and calls for a mix of apple cider vinegar and coconut vinegar, which I have yet to find in a store.

The main issue I had with the Vegan Baking recipe is the strength of the apple cider vinegar taste. Apple cider vinegar adds a sour fruity note to the butter, which contributes an important buttery flavor. However it is also a very strong flavor, and using apple cider vinegar as the only vinegar in this recipe overwhelms the butter’s subtle flavors.

The Vegan Baking article discusses this, and suggests a mix of coconut vinegar and apple cider vinegar if apple cider vinegar is too strong a taste. Since coconut vinegar is a rather unusual ingredient, I recommend mixing apple cider vinegar with something most people already have in their cupboard: white vinegar. I found that combining apple cider vinegar and white vinegar in a 1:3 ratio works very well.

Scale

The original recipe makes only a cup of butter (two regular-size sticks), which isn’t a lot of butter to make in a batch, and such a small amount of butter does not blend well in a 64oz vitamix container. For these reasons, I always make double batches of the recipe and freeze sticks of butter until I need them.

Recipe

Setup

Prepare a level place in your freezer for your butter to cool. Chill the mold you’ll be using in the freezer, so that the butter freezes quickly. Heat coconut oil until it’s liquid, but not much warmer than room temperature.

Prepare butter solids

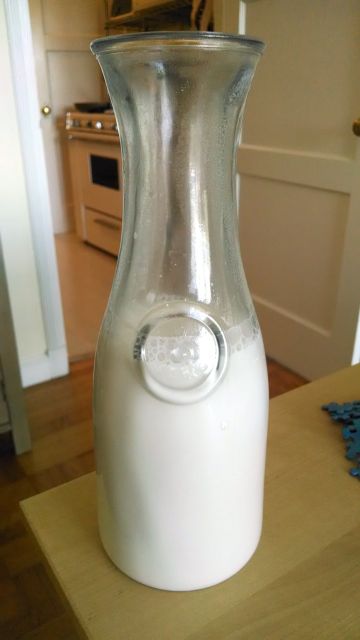
3/4 cup plain soy milk (unsweetened, unflavored, and without stabilizers; see above)
1/2 tsp apple cider vinegar
1 1/2 tsp white vinegar
3/4 tsp salt

Whisk ingredients and set aside for 10 minutes to curdle.

Prepare the oil blend

1 1/4 cups + 2 tsp lukewarm refined coconut oil
2 tbsp canola oil
4 1/2 tsp soy lecithin granules (or 2 tsp liquid soy lecithin)
1/2 tsp xanthan gum

Measure these into the blender that you’ll be using to blend. (Don’t blend yet, or you may scatter the lecithin granules, making them hard to mix in.)

Mix, blend and refrigerate

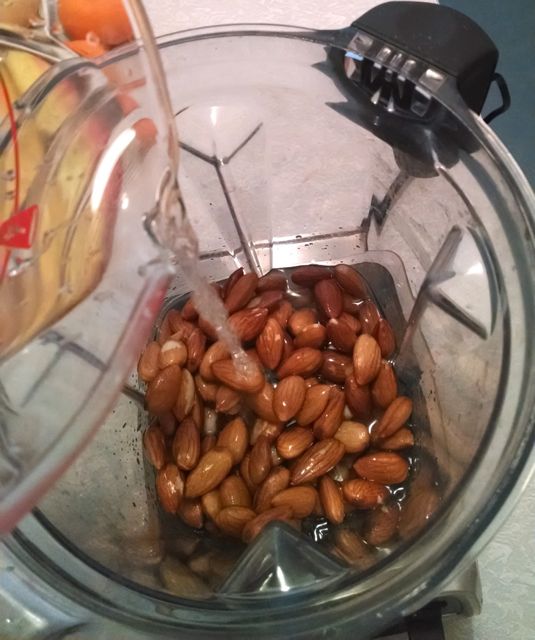
Add the butter solids to the oil mix in the blender, and blend.

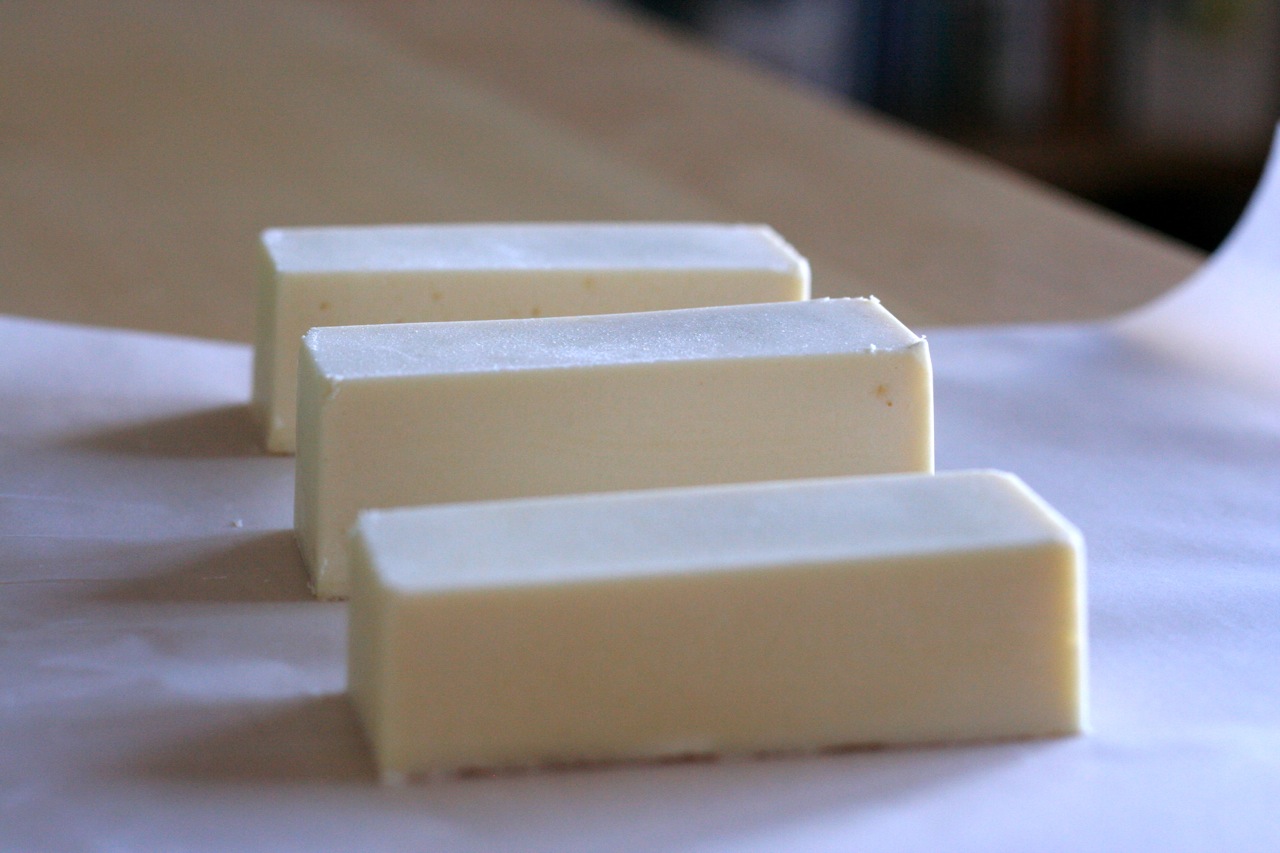
Once well-blended, pour into a mold. I use an Allforhome mold, which makes 1/4 cup sticks of butter (half the size of normal butter sticks).

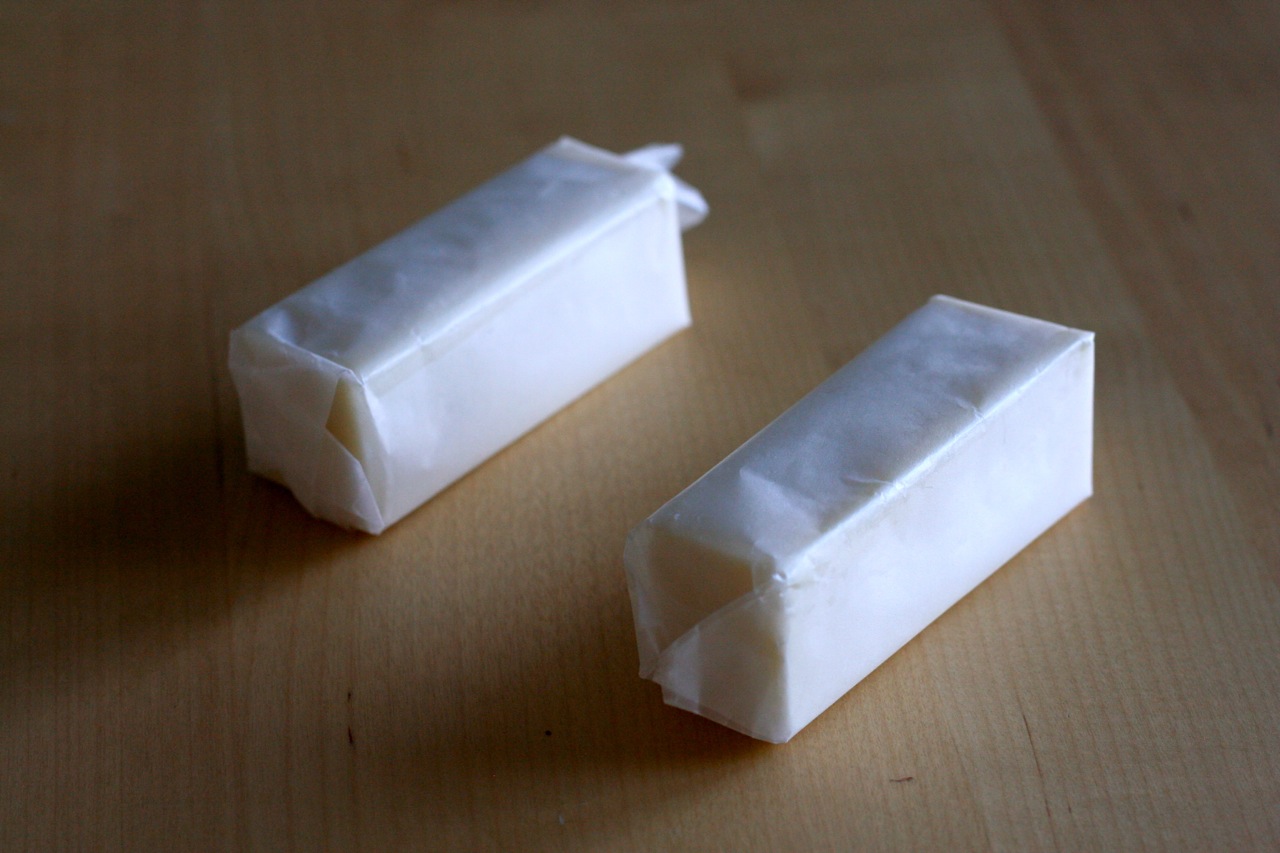
Put the mold in the freezer until the butter is frozen solid (a few hours).

Serve

Keep the butter in the freezer until ready to use, then move it to the fridge. If you’re able, keep it out at room temperature before using it to spread on bread. This yields a nice spreadable texture.

Final thoughts

Vegan butter is a great staple to have on hand, and it’s gratifying to make something that is so much better than what is available in stores. This recipe has won the approval of our family’s baker, who is otherwise skeptical of vegan butter, which is high praise.

I’m always open to trying different variations or improving a recipe, but to my palate, this butter is very nearly perfect.

Goma-ae

Goma-ae is my latest culinary love. It’s a sweet Japanese preparation of spinach with a sesame dressing sauce. I first encountered goma-ae at Shizen, San Francisco’s new vegan sushi restaurant (which I highly recommend), and it was an instant favorite.

Spinach is incredibly nutrient-dense, especially after cooking down. Almost anyone’s diet can be improved by adding cooked spinach, so this is a great addition to any home cook’s repertoire. I haven’t tried this dish with children, but my hope is that it would be kid friendly.

Goma-ae is fairly straightforward to prepare. The only real trick is not overcooking the spinach. Spinach cooks rapidly in boiling water, so you have to be quick, and then cool the spinach down in cool water to stop it from cooking further once you remove it.

The use of tahini here is a bit non-traditional. Traditional recipes use a larger amount of toasted sesame seeds, and a mortar-and-pestle to grind them. This is a bit easier, and tastes delicious.

Goma-ae

Goma-ae, prepared from just over a pound (500g) of raw spinach.

Recipe

I based this on a recipe from Japan Centre. I substituted tahini for some of the sesame seeds based partly on my observation of the Shizen dish. (Also because don’t have a mortar and pestle.) I also reduced the soy sauce a bit to highlight the other flavors.

I have a difficult time getting 1 tbsp of sugar to dissolve in 3 tbsp of liquid. The original recipe calls for 2 tbsp sugar in 3.5 tbsp of liquid, and doesn’t discuss heating to dissolve it. It actually makes me wonder if that’s not a typo. :) Maybe use agave or something if you don’t want to bother with dissolving sugar.

Ingredients

  • 500 g (1 lb) fresh spinach — I used baby spinach
  • 1 Tbsp soy sauce
  • 2 Tbsp mirin
  • 1 Tbsp sugar
  • 2 Tbsp tahini
  • 2 Tbsp toasted sesame seeds
    (or toast raw sesame seeds; see below)

Yields about 2 cups. Let’s call it 4 servings.

Preparation

Spinach

Boil water in a large pot. While it’s heating up, rinse and wash the spinach.

Prepare a bowl with ice water to cool the spinach after it cooks.

To cook the spinach consistently, you’ll have to get it in and out quickly. I’ve been boiling the spinach in a steamer basket, which makes it easy to remove quickly.

Boil the spinach just until the spinach turns a deep green. For baby spinach, this takes about 30 seconds. Fully grown spinach (which I haven’t tried) is said to take about a minute.

Once the spinach is out, run it under the faucet for a few seconds to cool it down, then put it in the ice water.

I had to cook the spinach in two batches to fit it all. Once the spinach has been cooked and chilled, drain it and squeeze the water out.

If you’re using fully grown spinach, cut it into two-inch lengths.

Dressing

Dissolve the sugar into the soy sauce and mirin. I find that I have to heat the mixture up by microwaving it for 15 seconds to fully dissolve it.

Once the sugar is dissolved, add the tahini and sesame seeds.

Toasting sesame seeds (if needed)

If you need to toast sesame seeds, it’s easy to do and just takes a few minutes. I toast sesame seeds a few cups at a time.

Put them in a sauce pan over medium heat, stirring frequently, until they become fragrant. Remove from heat, and let them cool on a tray. They can overcook if you keep them in a pan, and moisture is trapped if you put them in a jar right away.

Serve

Pour the dressing over the spinach. Goma-ae is best served cold, so consider putting it in the fridge for a bit before serving.

Nutrition

Just for kicks, here’s some basic nutrition info for a 1/2 cup portion:

  • Calories: 144
  • 17g carbohydrates, 7g fat, 6g protein
    (4g fiber, 9g sugar)
  • Potassium 21%, vitamin A 234%, vitamin C 59%, calcium 12%, iron 21%

Tempeh Buffalo Wings

This is the first recipe I made with Frank’s Red Hot, and I’ve gone through bottles of the stuff on this recipe alone. It tastes like junk food without being particularly unhealthy, and is a fun way to prepare tempeh.

Tempeh Wings

I got this recipe from Clean Green Simple, which says you can also make this with cauliflower. I find that tempeh works well, and I like to have a protein (or high-lysine food, if you want to get technical) with every meal, so I haven’t tried the cauliflower variety.

I use Rhizocali Tempeh, an Oakland-made tempeh that can be found at Rainbow. It’s distributed frozen, and keeps indefinitely in the freezer. I buy a bunch of it at a time, so that I always have protein on hand.

I’m using use Frank’s Red Hot original sauce, which contains just peppers, vinegar, salt and garlic powder. They also make a buffalo wing sauce which might also be vegan, but it has “natural butter type flavor” as an ingredient, so who knows what that means.

I make this recipe with less sauce and oil than the Clean Green Simple version. If you’re serving it in appetizer portions, this may not matter, but I usually eat this as an entree, split between two people. I make this pretty frequently, so reducing the oil makes it more tenable as a frequent entree.

Preparation

Cut the tempeh into roughly french fry shaped pieces.

tempeh wings - 01

Coat the tempeh pieces in the batter, and put the battered pieces onto a non-stick baking sheet. I’ve been using a Silpat non-stick baking mat for these, although an oiled pan may also work. Let excess batter drip off so that it doesn’t form a puddle under the tempeh on the baking sheet.

tempeh wings - 02

I find I have to go back and touch up the parts of the tempeh that I was holding, since they are otherwise missing batter.

tempeh wings - 03

Bake at 350°F for 15 minutes, then brush them with hot sauce and oil, and bake for another 5 minutes. When brushing, I try to move them and get some of the hot sauce under them, so that the bottom isn’t too dry.

tempeh wings - 05

Tempeh, baked and glazed. These are a bit overcooked. :)

Brush the tempeh with the remaining sauce, and serve immediately.

tempeh wings - 07

Tempeh wings with steamed broccoli and pastina.

Recipe

Ingredients:

  • One 8 oz package of tempeh.

Batter:

  • 1/2 cup flour
  • 1/2 cup water
  • 1 tbsp Frank’s red hot

Sauce:

  • 2 tbsp Frank’s red hot
  • 1.5 tbsp oil

Preheat the oven to 350°F. Cut the tempeh into french fry sized pieces. Mix the batter together, dip the tempeh pieces to coat, and put them on a non-stick baking sheet. Bake for 15 minutes.

Mix the hotsauce and oil together. Brush the tempeh lightly with sauce, and bake for another 5 minutes.

Coat the tempeh with the remaining sauce, and serve immediately.

Nutrition

By my count, the recipe totals 843 calories (and 48g protein). If split between two people, that’d be 421 calories (and 24g protein) per person. With broccoli and rice, it’s about 670 calories (and 31g protein). If you’re dieting, you may want to reduce the rice to 1/2 cup for a total of 562 calories.

My point with all of this is that junk food has its place, even in calorie-restricted diets. This is truly excellent junk food, and isn’t even particularly unhealthy. It just seems unhealthy, which is a quality to be respected and admired in reasonably healthy food.

Vegans don’t have enough junk food entrees. I do my part by making this almost every week.

Related work

Prior research into vegan food made with Frank’s Red Hot includes:

Homemade almond milk!

One of the main adjustments involved in switching to a vegan diet is replacing dairy with plant-based alternatives. Almond milk was an early favorite of mine. It has a neutral taste, goes well with cereal, and makes a great hot chocolate.

However nothing compares to the creamy deliciousness of homemade almond milk. Whereas store-bought almond milk can be a bit watery and thin, homemade almond milk is thick and creamy. Homemade almond milk is one of the great discoveries I’ve made since adopting a vegan diet.

Even if you have never enjoyed almond milk, I’d encourage you to give homemade almond milk a try.

Background

Making almond milk is fairly simple. You soak almonds, blend them with water, and strain them through a nut milk bag, a fine nylon mesh bag made for this purpose.

Nut milk bags are like a sturdier, finer version of cheesecloth. You should be able to find them at any health food store, although the heavy duty kind sold online are much higher quality than the ones I’ve found in stores. I’ve been using this Ellie’s Best bag recently.

Prior art

Typical almond milk recipes simply soak almonds, blend them with water, and strain. This leaves the almonds’ outer skin intact, and mixed into the almond milk, producing a grey color. The advantage of this approach is the easier process, and the skin nutrients remain in the milk.

To make whiter almond milk, recipes may suggest blanching the almonds, which means removing the outer skin. This does produce a whiter milk, but is tedious and labor-intensive.

Oral allergies

A minor complication is that almonds are a common oral allergen. Oral allergies are a type of crossover sensitivity typically caused by an allergy to a pollen that is similar to protein found in foods. If raw almonds make your mouth itch, but you are not allergic to cooked almonds, then you may have almond oral allergies. An allergist can help you make this determination.

Store-bought almond milk is pasteurized, whereas homemade almond milk made from raw almonds is not. This spells trouble for those of us with an oral allergy to raw almonds. To neutralize the oral allergens, we’ll have to heat the almonds at some point in the process.

(Just to be clear, if you have a true almond or tree nut allergy, you should not consume any almond milk, including almond milk made with this recipe. Please consult an allergist if you’re unsure.)

Invention: the boil-soak approach

Here, I present an alternate approach, that has some of the benefits of both regular and blanched almond milk, without the time-consuming blanching process.

This technique involves boiling almonds in some water for a few minutes at the beginning of the soaking process. Heating almonds to boiling temperatures denatures the allergenic proteins, making them safe for those of us with oral allergies. This is much easier than boiling the almond milk later, since almond milk has to be heated very carefully.

Then, leave the almonds soaking in the water you boiled them in for up to a day, moving them to the refrigerator after they cool.

To make white almond milk, discard the soaking water (now a dark brown color) and use new water for the almond milk. If you’d rather preserve the almond skin nutrients, feel free to use this water for the almond milk, but measure it out so you use the right amount of water.

This approach is oral-allergy friendly, lets you make white almond milk easily, and produces incredible almond milk.

Recipe

You’ll need 1 cup of raw almonds, some water, a nut milk bag, something to boil and soak almonds in (a small pot works fine) and a blender.

Ahead of time (8 to 24 hours is great, but shorter is probably fine), put the almonds in enough water to cover them by an inch or so, and boil for a few minutes. Then let them sit in that water and soak, covered. Put the pot in the fridge once it’s cool if you’re going to soak longer than 8 hours or so.

1. Blend the soaked almonds with two cups of water.

2. Pour the almond mixture into a nut milk bag in a container.

I recommend using a pourable container like a large measuring cup, since we’ll be transferring liquid between this container and the container you’ll store the milk in.

Almond milk - 05Almond milk - 04Almond milk - 06

3. Squeeze!

Be gentle, especially at first, to avoid almond solids from squirting out. You can use more pressure as the contents become more solid. Don’t stress too much if some solids escape.

Almond milk - 07Almond milk - 08Almond milk - 09Almond milk - 10almond milk 20 - Version 2Almond milk - 13 cropped

You’ll be left with the first pressing of almond milk and almond pulp.

Don’t rinse the blender or wash out the nut milk bag, since we’ll be repeating this. Pour the almond milk into the container you’ll store it.

4. Again!

Return the pulp to the blender, and blend with another 2 cups of water, to get all the almond milk we can out of the pulp. Strain again, separating pulp from almond milk.

5. Final blend

Finally, set aside the pulp, and return some almond milk to the blender (which is still messy, with almond bits on the side). Using the most recently pressed 2 cups will work fine. Blend for a bit to incorporate almond bits.

This is also a good time to add any supplements you’ll be adding to the milk. (I’ll write more about fortifying plant-based milks later.)

Strain the milk one last time. This will be really easy, since the milk has very little pulp, and will mostly pour right through the bag.

6. Done!

Combine the almond milk from the two phases, and refrigerate.

You should have about a liter of milk. Depending on how thoroughly you blended, the milk may be very thick, and may benefit from adding extra water. I find it’s best to thin it to taste after making it.

Almond milk - 25almond milk 05a

Serve over cereal with fruit (berries, peaches, etc.) for a delicious snack / dessert.

Variations

You can make a really delicious milk by toasting the almonds first before making almond milk. This works fine from an oral allergy perspective, and adds a unique flavor to the milk. (It’s great with cookies, for instance!) However I can’t drink very much of that milk; it’s fairly rich, and is less versatile than regular almond milk, since it has a stronger flavor.

For a while I was adding a few toasted almonds with almond milk that I otherwise prepared normally, to give it a little stronger flavor, although most of the time I don’t bother these days. Experiment and see what works for you.

References

  1. LaBronx, Honey. “Episode 2 (Almond Milk).” Vegan Drag Queen Cooking Show. 28 Sep 2011. (Accessed 2 Nov 2014.)

  2. Chef, Vegan Black Metal. “Episode 1: Pad Thai.” Vegan Black Metal Chef. 9 May 2011. (Accessed 2 Nov 2014.)

    Not really relevant, I just think this something you should know about.

Getting omega-3’s: Science, texture and allergies

As I explained in a previous post, it’s important to have a reliable source of omega-3’s.

It took me some research and experimentation to find a cheap, hassle-free source of vegan omega-3’s that worked for me, so I wanted to share my findings. Since plant-based omega-3’s are in the form of ALA (alpha-linolenic acid), I’ll refer to vegan omega-3’s as ALA throughout this article.

What I was looking for

I wanted an easy source of ALA that I could add to my diet without a lot of change. I wanted to stick to a form that was fairly cheap, reasonably shelf stable, and which research supported as containing absorbable ALA. The ratio of omega-6’s to omega-3’s may be important, so I wanted a food that had few omega-6’s along with the omega-3’s. Finally, I have oral allergies which, while not life threatening, make many raw foods very unpleasant to eat, and possibly unsafe. I’d have to stick to a form of ALA-containing food that did not aggravate my allergies.

The contenders

I wanted a minimal dietary intervention, so while walnuts contain ALA, the ALA in walnuts is not very concentrated. You’d have to eat a lot of nuts to meaningfully boost your omega-3 levels, which would be a substantial dietary change. Similarly, tofu and soy products have ALA, soy ALA is also not very concentrated, and soy contains 10 times as much omega-6’s as omega-3’s.

The most concentrated sources of omega-3 fatty acids are flax seeds. About two teaspoons of flax seeds gives the American Heart Association’s recommended daily dose of omega-3 fatty acids.[4] Chia seeds are also a concentrated source. These are both promising candidates, so I focused on these.

ALA availability

The first challenge is that ALA from whole flax seeds is not absorbed in digestion. This means that even though there is a lot of ALA in flax seeds, your body will get very little ALA from them. Generally I found that nutrition information on the internet to be in agreement with the research here — to get ALA from flax seeds, you have to grind them or process them into flaxseed oil.

Interestingly, I found internet nutrition information to disagree with the research I could find on chia. Internet nutrition advice suggested that chia seeds, unlike flax, do not have to be ground for their ALA to be absorbable. However the only human study I found disagreed with this, and found that ALA was only absorbed from ground chia seeds, just like flax.

Ok, so we’ll have to grind them. No problem. A coffee grinder or a Vitamix will do the trick.

Texture

I wanted to incorporate flax or chia seeds into foods that I was already eating. Since it’s recommended to take flax and chia with lots of water, I wanted to use wet foods that I already eat frequently — oatmeal and lentil soup.

The problem is that when exposed to water, flax and chia seeds form a gel-like texture that I’ve heard compared poetically to pudding, or less poetically to mucous. While I find the texture of whole chia seeds pleasant when added to oatmeal or soup (although it took some getting used to), I find the texture of ground chia or ground flax much less appealing when added to wet foods. Unlike whole chia, there are no crunchy bits to break up the gel mush.

I’m curious if I’m alone here, because I couldn’t find much discussion online about avoiding gross textures with these seeds in their recommended wet form.

(I’ll note that some people suggest using flax meal as an egg replacer in baked goods, which avoids the texture issue. I don’t do much baking, I don’t want my daily omega-3 regimen to be so labor-intensive, so I didn’t find this to be a realistic strategy for me. If you bake a lot anyway, this could be a great strategy!)

Oral allergies

One last constraint, although one that only affects 1% of people: I have an oral allergy to raw flax seeds. (I have a similar sensitivity to chia, but I haven’t looked into it in as much depth.) This means that I can only consume flax and chia seeds that have been heated.

Roasted ground flax

I decided to try roasting flax seeds to solve the allergy problems, then grinding the roasted seeds to improve ALA digestibility. This was delicious, and surprisingly, did not have any effect on the texture of oatmeal or lentil soup. It adds a pleasant roasted flavor to these foods. So far so good. So does the research support this as a source of ALA?

Since ground flax seed is already established as an effective source of ALA, I was mostly concerned with whether or not roasting the flax seeds, grinding them, and then reheating them (in my case, adding them to oatmeal or soup) would compromise the ALA. Flaxseed oil is said to degrade when exposed to heat, so I was curious if the same would happen to my roasted flax seeds.

I found a great paper on roasted ground flax! The researchers roasted and ground flax seeds, then baked cookies with the roasted ground flax seeds. They then analyzed the cookies for ALA content, and found them to contain ALA as expected. (I’m in favor of any research paper that has a “Evaluation of cookies” section.) They even tested cookies that were stored at room temperature for 90 days to measure shelf stability. They found that the ALA degraded only slightly over 90 days at room temperature.[1]

Another study tested heating whole and ground flax seeds, as well as flaxseed oil at 178°C (350°F) for 90 minutes, and found the ALA in whole flax seeds to decrease by 3.4%, while the ALA in ground flax seeds and flaxseed oil lost 6-7% of ALA.[2] This is much better than I expected, especially considering that typical flaxseed roasting times are on the order of 15 minutes — 1/6th of the time used in the study. This study arguably supports cooking whole flax seeds and then grinding them, rather than grinding them first, although since we’re talking about a 3% difference, it doesn’t really matter.

These studies did not measure absorption, but a third study demonstrated that ALA from baked goods made from milled flax is absorbed in digestion.[3]

Considering all of this, I think there is good evidence that roasted ground flax seed is an effective source of ALA.

Recipe

Spread 1 cup of flax seeds on a baking sheet, then bake for 10-15 minutes at 350°F, or until fragrant.

Flax seeds hot from the oven.

Grind the roasted seeds in a coffee grinder or high-speed blender.

The ground roasted flax seeds take about 30% more space than the seeds did before blending.

Ground flax.

The roasted flax should be shelf-stable at room temperature, either whole or ground.

You could also grind the flax first, and then roast it. Both should be effective sources of ALA, but note that ground (raw) flax is annoying to work with. It tends to clump together in the presence of any moisture, and its tendency to form a gel when wet makes it difficult to clean out of blenders, etc. If you have a strainer on your sink drain, the flax gel will stop it up. When possible, roast first.

Add 1 tsp to foods, twice a day (so 2 tsp / day total).

Flax-enriched oatmeal

Here are some pictures of roasted ground flax in oatmeal. I may have used 2-3 tsp of flax here to illustrate how it disappears.

Now you see it ...

Now you see it …

… now you don’t. (The same, after stirring.)

There you have it!

Super easy, and cheap. I roasted 2 cups of flax a while ago, and it’s lasted me months.

Epilogue

Spreadsheet

Just for kicks, I made a spreadsheet illustrating the various omega-3 approaches I considered.

You’re welcome.

References

[1] Rajiv J et al. Rheology, fatty acid profile and storage characteristics of cookies as influenced by flax seed (Linum usitatissimum). J Food Sci Technol. Oct 2012; 49(5): 587–593. doi: 10.1007/s13197-011-0307-2 (via Pubmed)

[2] Chen ZY et al. Oxidative stability of flaxseed lipids during bakingJ Am Oil Chem Soc. 1994; 71:629–632. doi: 10.1007/BF02540591 (via DeepDyve)

[3] Austria JA et al. Bioavailability of alpha-linolenic acid in subjects after ingestion of three different forms of flaxseedJ Am Coll Nutr. 2008 Apr; 27(2):214-21.

[4] There is no RDA for omega-3’s, so I have to use 3rd party recommendations here — in this case, from the American Heart Association. In fairness, the AHA recommends fish, which contain DHA and EPA, rather than ALA, which plant-based sources of omega-3’s provide. I think an algae-based DHA supplement may be wise for vegans, or arguably oysters, if that is consistent with your ethics.

Homemade Vegan Butter

I’ve been looking into vegan butter alternatives that don’t involve palm oil.

Butter, vegan or otherwise, should be solid at room temperature. This means that it must have saturated fat.

Unfortunately, the cheapest sources of saturated vegetable fat are hydrogenated vegetable oils (which have trans fats, which are banned in California due to health concerns) and palm oil (which is a major cause of rainforest destruction). Virtually all store-bought margarines are based on one of these ingredients.

Luckily, we can make homemade vegan butter from refined coconut oil!

I’ve tried two vegan butter recipes so far. The first I found on Luminous Vegans, and is based on a recipe by Miyoko Schinner. It worked great, although I didn’t take photos.

The second, which I’ll discuss here, is the basic coconut oil butter recipe by Mattie at Veganbaking.net. The two recipes are very similar, with the same ingredients in slightly different proportions (with the exception of xanthan gum, which is only in the Veganbaking recipe).

See the original recipe for details, but the gist is as follows:

  • Combine soy milk and apple cider vinegar, and let it sit for 10 minutes or so to curdle.
  • Warm refined coconut oil until liquid, but close to room temperature.
  • Combine all ingredients in a food processor or blender.
  • Pour into a freezer-safe container or silicone mold, and place in the freezer to rapidly cool.
  • Remove from mold and enjoy!

I doubled the recipe for easier mixing in my blender, and to match the batch size for Miyoko Schinner’s recipe. I also used a bit more salt than called for — 1 tsp versus 3/4 tsp; the original 3/4 tsp is probably about right.

Vegan butter mixed and poured into a mold.

I took Veganbaking’s recommendation and got a silicone mold. They recommend the Tovolo King Cube mold. I wanted a rectangular shape, so I got this Allforhome rectangular mold. This mold makes nice butter shapes, although they are smaller than real sticks of butter.

I pre-chilled the mold to help the butter cool rapidly, since it’s important to solidify the butter shortly after it’s mixed, or it will begin to separate. However I took some photos between mixing the butter and freezing it in the mold, so this did cause some separation.

Pro tip: You really want the butter to be level in the freezer, or you’ll get some slanted butter sticks. If your freezer looks anything like mine, that will require some planning in advance. I planned this imperfectly, and got some slightly crooked butter.

The finished product!

I wrapped the sticks of butter in wax paper for storage in the freezer. They didn’t quite stay wrapped as well as I’d have liked, but they look nice anyway.

Wrapped and ready to go.

So enjoy! I’ll update with some pictures of the butter in action.

Strawberry Ginger Lemonade

So far, making a smoothie without a recipe is as easy as I’d hoped. Throw in some fruit, some combination of ice and water, blend, then sweeten to taste. So here’s the first drink I made with the Vitamix:

Strawberry Ginger Lemonade

  • Three whole lemons, peeled
  • Five strawberries, hulled
  • About an inch of ginger, grated
  • 1 cup water
  • 3 cups (a little more than a tray) ice
  • 1/2 cup sugar

First, blend fruit, ginger and water, to be sure the lemon seeds are pulverized. Then add ice, blend again. Then sweeten to taste. About a 1/2 cup of sugar worked for me. This made about 4 tall glasses for us.

strawberry-ginger-lemonade

To make this in a conventional blender, slice the lemon into eighths, and remove the seeds. Also consider slicing the strawberries.

I’ve heard people suggest throwing a piece of ginger into a high-powered blender, rather than grating it. I tried this once, but found that it added a stringy texture that I didn’t like. Maybe I just didn’t blend it enough.

Tempeh BLT

This recipe is inspired by Frida’s in St. Louis, where I first tried tempeh bacon earlier this month. (Totally great!)

I never really had BLTs as an omnivore, so I just see this as an interesting way to enjoy tempeh, rather than a way to recreate a favorite meal.

There’s not much of a recipe here, since I was starting with pre-marinated tempeh bacon, rather than making my own from plain tempeh. I used Lightlife Smoky Tempeh Strips.

Image

They’re pre-cut into thin slices, roughly similar to how bacon is sliced.

The “recipe”: Pan fry it in some oil until it seems done to you. I could fit the whole package (enough for two sandwiches) in a large pan at once.

Then assemble a sandwich: lightly toasted bread, sliced tomato, lettuce, and vegan mayo (I used Nayonaise).

Image

Served with roasted brussels sprouts.

Basic Roasted Brussels Sprouts

So simple it barely qualifies as a recipe, but roasted brussels sprouts are one of my favorite things to make.

Ingredients:

  • 1.5 lbs brussels sprouts
  • 3 tbsp olive oil
  • 2-3 pinches salt (whatever kind you prefer; course grained salt is better)

Preheat oven to 350°F. Cut the ends off the brussels sprouts, and cut them in half, or in thirds if they’re big. Don’t worry about leafy bits coming off; keep them with the chopped sprouts.

Put the chipped brussels sprouts in a mixing bowl. Sprinkle in 3 tbsp olive oil and a few pinches of salt. Mix them about until the oil is distributed fairly evenly. Pour the oiled brussels sprouts on a baking sheet (preferably with edges) and spread them as evenly as possible.

Roast them in the oven for 30 – 40 minutes total. About halfway through, flip the brussels sprouts over.

They’ll have a crispiness to them when they first come out of the oven (almost like kale chips), and they’re best eaten soon afterward. Enjoy!

Tempeh manis

Tempeh manis is a somewhat sweet preparation of tempeh (fermented soybeans), and is one of my favorite dishes from a trip to Indonesia a year ago. I’d been looking for a good tempeh manis recipe, until an Indonesian coworker pointed my girlfriend and I at the recipe on The Little Teochew.

The recipe is essentially the following:

  • Fry 16oz of tempeh, and set it aside.
    I pan fry, rather than submerging the tempeh in oil.
  • Then pan fry a few shallots sliced thinly, garlic, and a sliced red chili in oil.
    I didn’t have shallots this time, so I used half an onion. I also seeded the chili. It wasn’t spicy at all, so maybe unseeded would be fine.
  • Add 1/2 cup water and 1.5 tbsp sugar to the pan, and cook until it starts to caramelize.
    The amount of water doesn’t really matter, since it’ll cook off until the right amount of water is left. I tried to dissolve the sugar in the water before adding it.
  • Add the tempeh back in, and drizzle 1 tbsp kecap manis (see below) evenly throughout.
    You’ll want to add the tempeh before the sauce gets too thick, otherwise it won’t spread onto the tempeh very evenly. If it’s too thick, just add some water, and try again.
Tempeh manis

Tempeh manis, with red rice and roasted asparagus.

There was one hard to find ingredient in there: kecap manis (alternatively, “kicap manis”, or “Indonesian Sweet Soy Sauce”). The nearest Asian grocery store to me, Duc Loi in SF’s Mission district, didn’t have it, despite an aisle of sauces from various Asian cuisines. I tried a few places in the Richmond, until striking gold at New May Wah, which has a large Indonesian section, including an entire row of kecap manis sauces.

The turning point: every bottle pictured is kicap manis.

The turning point: every bottle pictured is kecap manis.

Kicap manis closeup

I’m not entirely clear on what this stuff is. The ingredients are listed as: “Soybean, sugar, salt, NA benzoate preservatives and selected spices”. I’d describe the taste as being similar to molasses with a hint of soy sauce. It’s pretty tasty though, and gives the tempeh a nice color.

I’m also told that some people see the use of kecap manis as cheating, so assumedly there is a longhand version of this recipe that produces something similar without using kecap manis. For now I’m pretty content to stick with this version.

This dish is on the sweet side for a main, and is often served as an appetizer in Indonesia. We use it as a protein from time to time, but if you’re sensitive to sweet foods you may want to go easy on the sugar, or have smaller portions as a snack.

Update: The Great Dorset Vegetable Experiment has a recipe for making Kicap Manis! Fascinating. If we continue to make this, we’ll have to try that sometime. Although for the time being I have a ton of the store-bought stuff.